

 العربية
 کوردی
کوردیTo upload and manage files in cPanel using File Manager, follow these steps:
Step One: Access File Manager
- Start by logging into your cPanel account
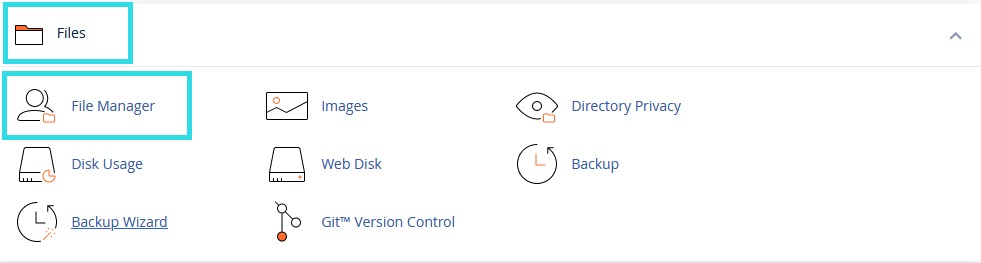
- Navigate to the "Files" section and select "File Manager"
Step Two: Select Target Folder
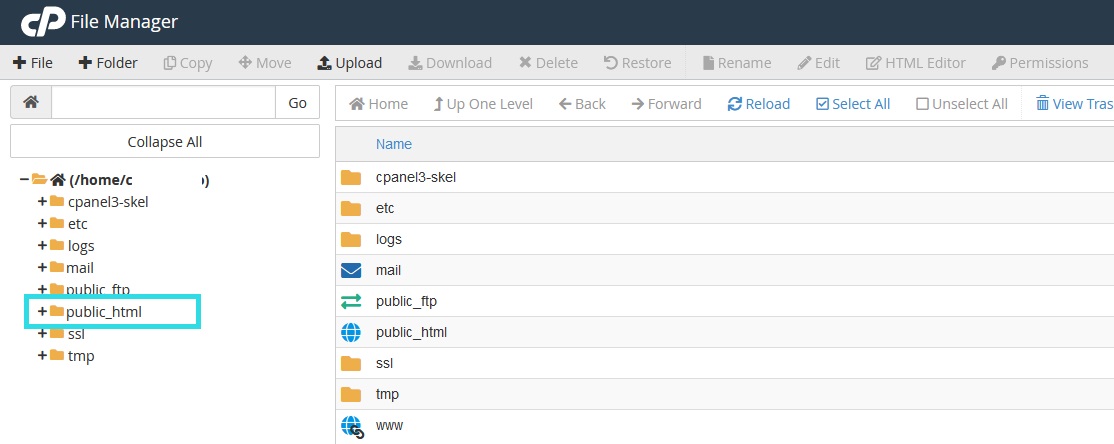
- Choose the folder where you want to upload files
- Usually the main folder is named
"public_html"for public files
Step Three: Upload Files
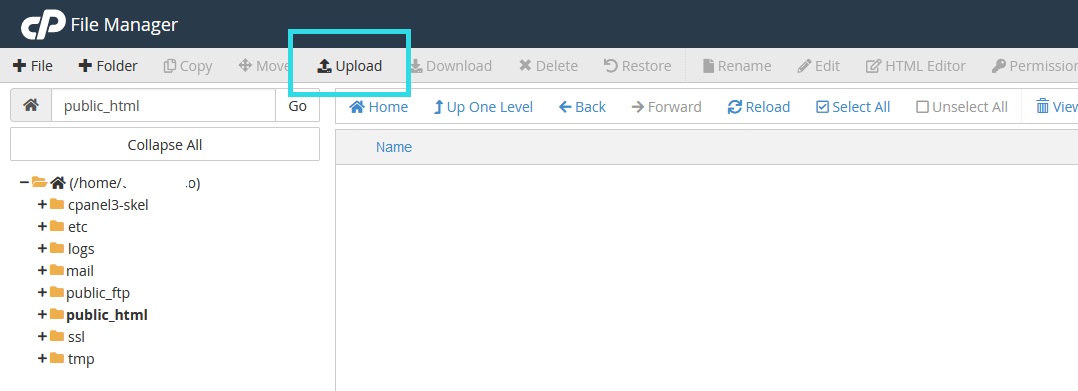
- Select "Upload" from the top toolbar
- Click "Choose File" to select the files you want to upload
- Wait for the upload process to complete
Step Four: Verify Uploaded Files
- After upload completion, navigate to the target folder
- Verify the presence of uploaded files and check their names
Additional File Management
You can use File Manager to:
- Edit Files: Modify code and text directly
- Move Files: Organize folder structure
- Delete Files: Remove unwanted files
- Create Folders: Organize content
- Compress Files: Create ZIP archives
Important Warning: Do not make any modifications or deletions outside the
"public_html" folder unless you know what you're doing. This may cause the website to malfunction. Make sure to place website content only inside the "public_html" folder.Tip: Create backups of important files before making any major modifications to them.