

 العربية
 کوردی
کوردیTo install WordPress on your website, follow these steps:
Step One: Access WP Toolkit
- Log in to your cPanel control panel
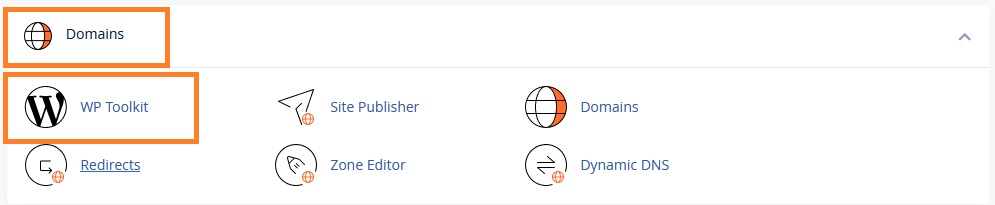
- From the Domains section, select the WP Toolkit tool
Step Two: Start WordPress Installation
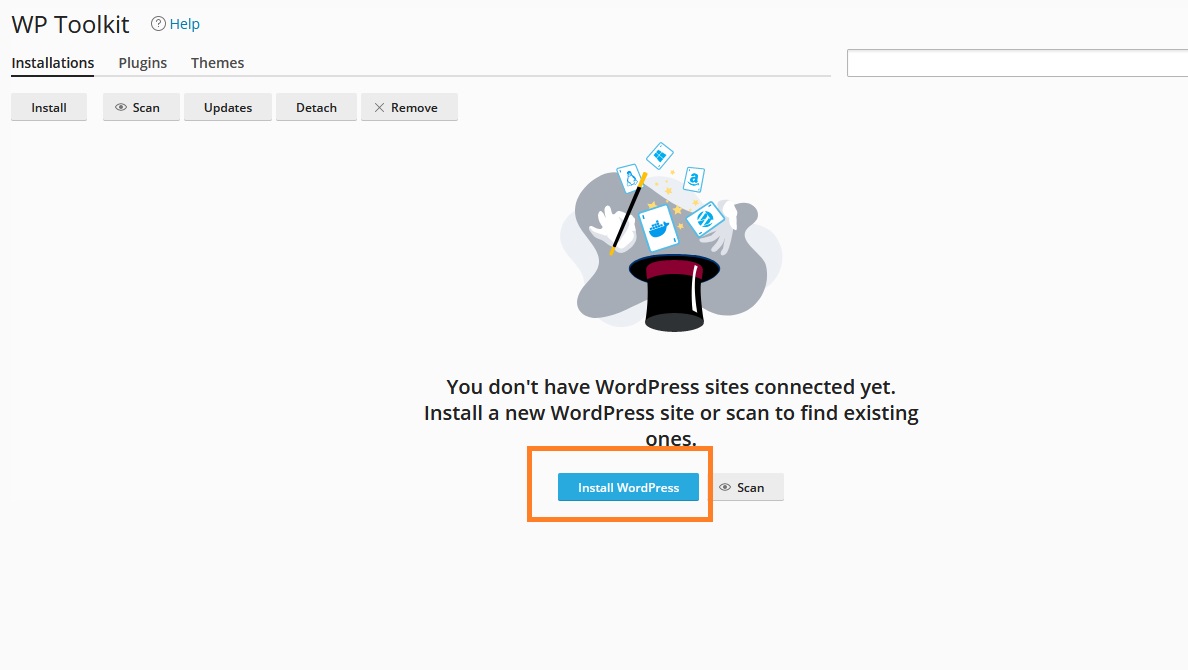
- From within the WP Toolkit, click on Install WordPress
Step Three: Configure Installation Settings
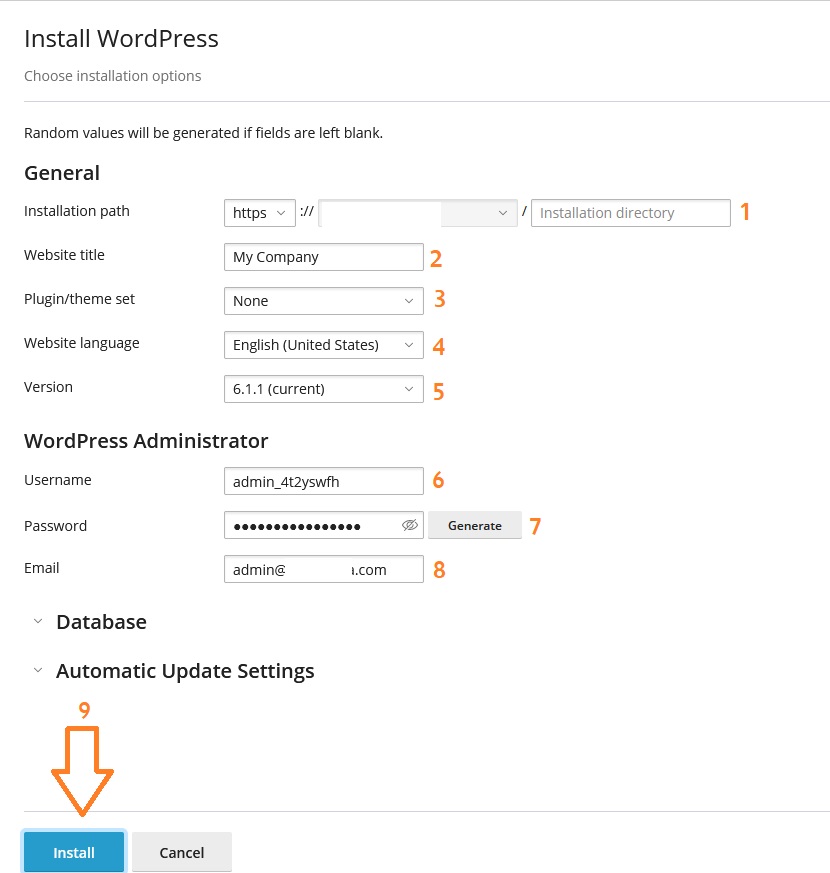
The WordPress installation window will appear with the following settings:
Required Installation Settings
- Installation Path: Leave as is if you want to install in the root directory, or choose another name if you want to place it in a subdirectory (e.g., "blog")
- Site Name: Enter your website name
- Plugins and Themes: You can choose what's suitable for you, or ignore this option if you don't have sufficient knowledge
- Site Language: Choose the appropriate language
- WordPress Version: Leave as is to install the latest version
- Username: Administrator username for the site
- Password: Strong password for the site administrator
- Email: Email address for the site administrator
- Click Install to complete the installation
Accessing Admin Panel: Once finished, you can access the WordPress admin panel through the link
www.domain.com/wp-admin by replacing www.domain.com with your actual domain.