 العربية
 کوردی
کوردیTo add and verify ownership of your website to Google Search Console, follow the detailed steps below:
Prerequisites
Before starting: Make sure you have:
• An active Gmail account
• Access to your website's cPanel control panel
• The correct domain name of your website
• An active Gmail account
• Access to your website's cPanel control panel
• The correct domain name of your website
Step One: Sign in to Google Search Console
- Open the following link in your browser:
You will see the following screen when accessing for the first time:
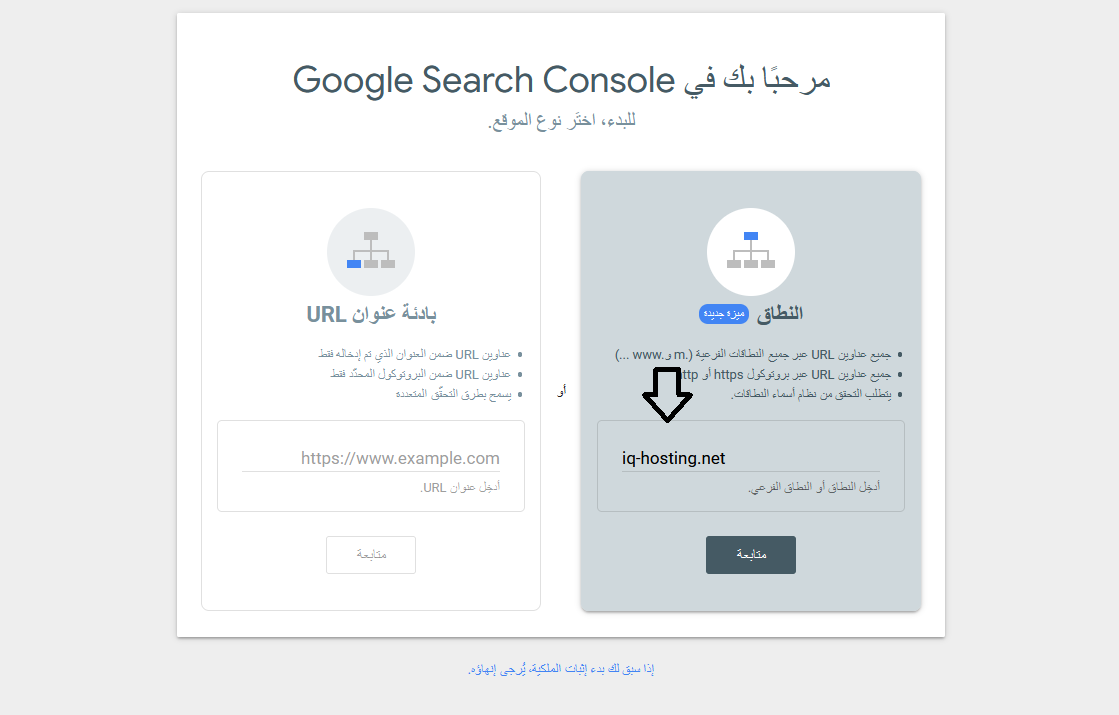
Step Two: Enter Domain Name
- Enter your domain name in the designated field
- Make sure to enter the domain correctly:
example.com(without www or https) - Click the "Continue" button
Important Notice: Enter the domain only without protocol or subdomain
✅ Correct:
❌ Wrong:
✅ Correct:
example.com ❌ Wrong:
https://www.example.comStep Three: Copy Verification Code
- Copy the verification code as shown in the figure below
- Keep this code for use in the following steps
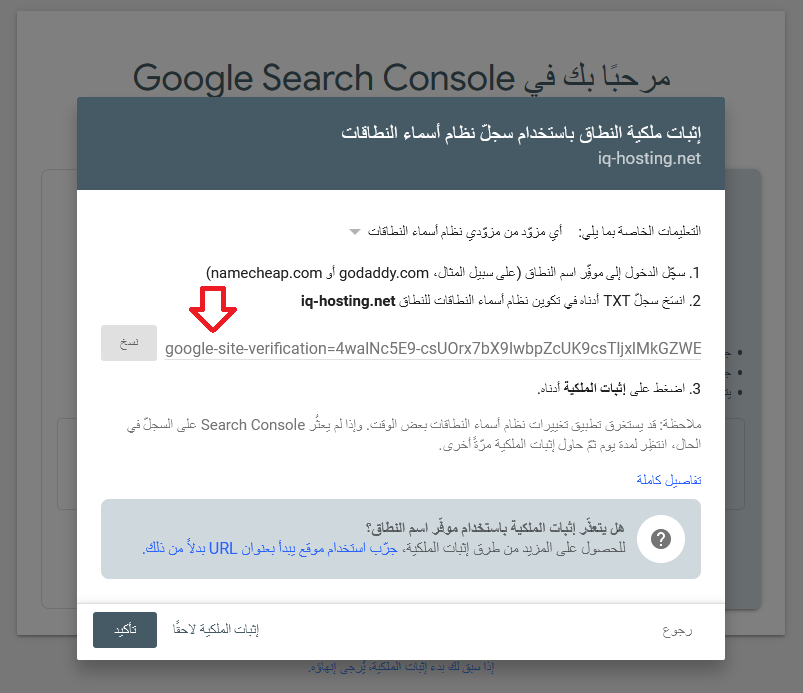
Note: The verification code usually starts with
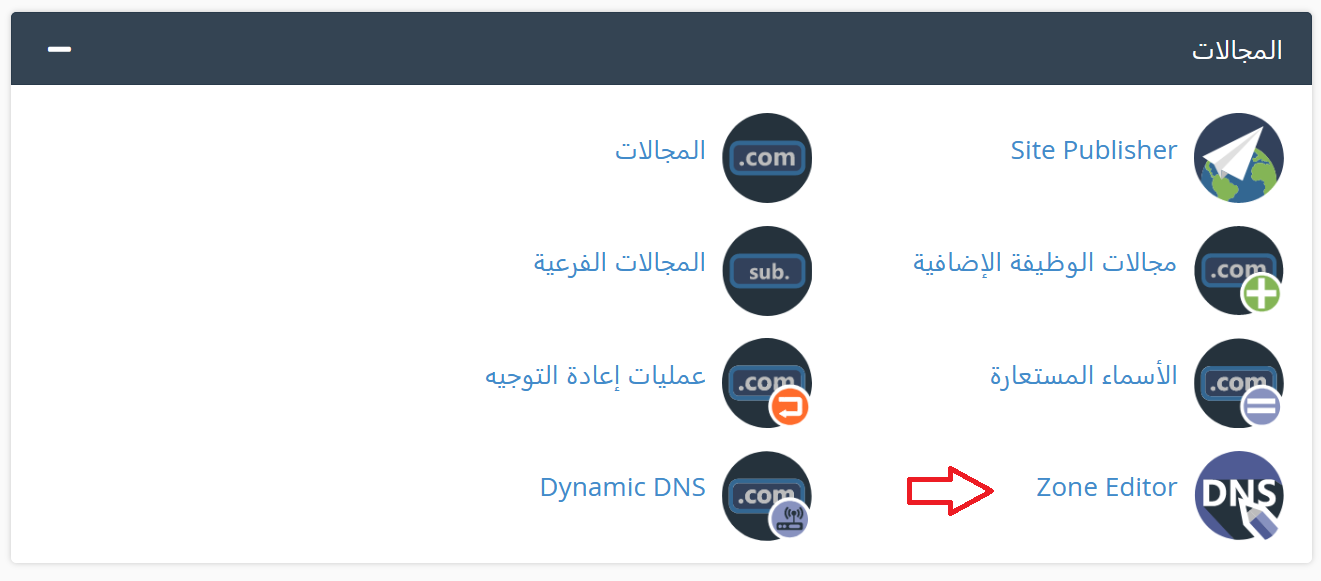
google-site-verification= followed by a string of letters and numbersStep Four: Access DNS Editor in cPanel
- Log in to your website's cPanel control panel
- Navigate to the "Domains" section
- Select "Zone Editor" as shown below
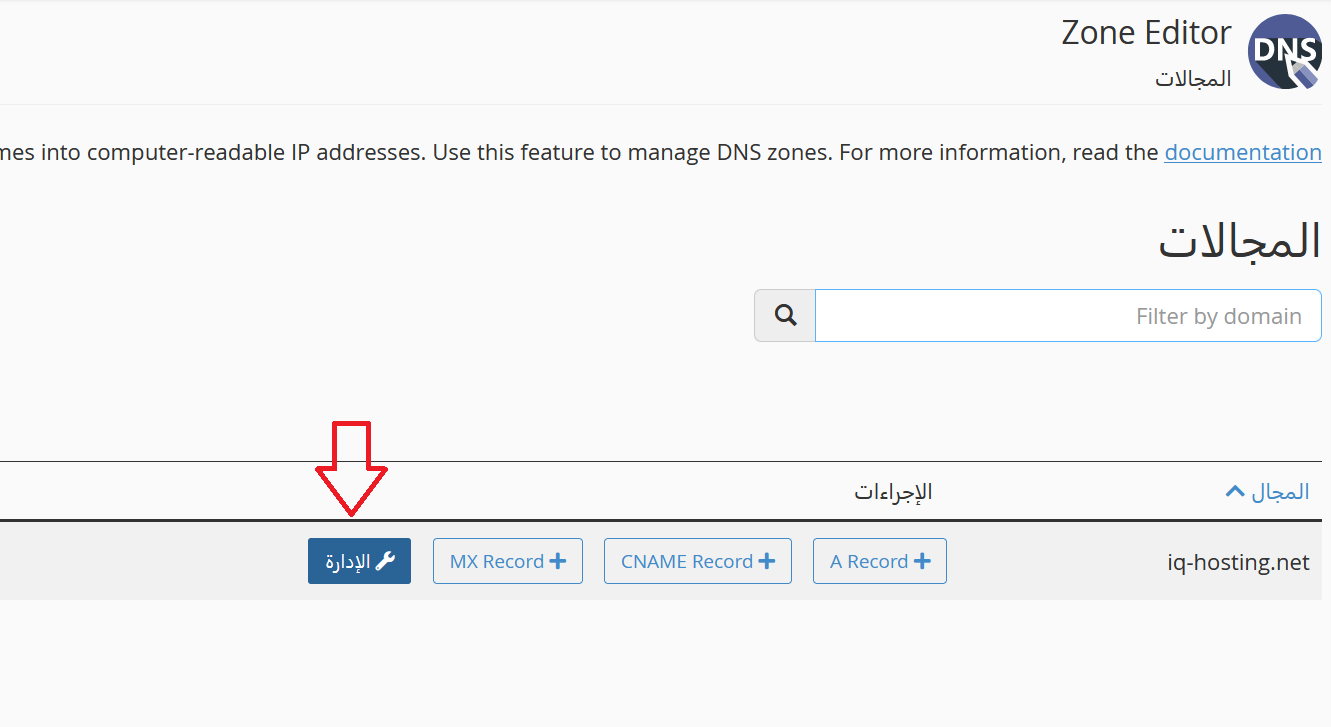
Step Five: Manage DNS Records
- In the Zone Editor page, click the "Manage" button for your domain
Step Six: Add TXT Record
- Click "Add Record"
- Select the "Add TXT Record" option from the dropdown menu

Step Seven: Enter Verification Data
- In the "Name" field: Enter your domain like
example.com. - In the "Record" field: Paste the verification code you copied from Step Three
- Make sure the data is correct as shown below
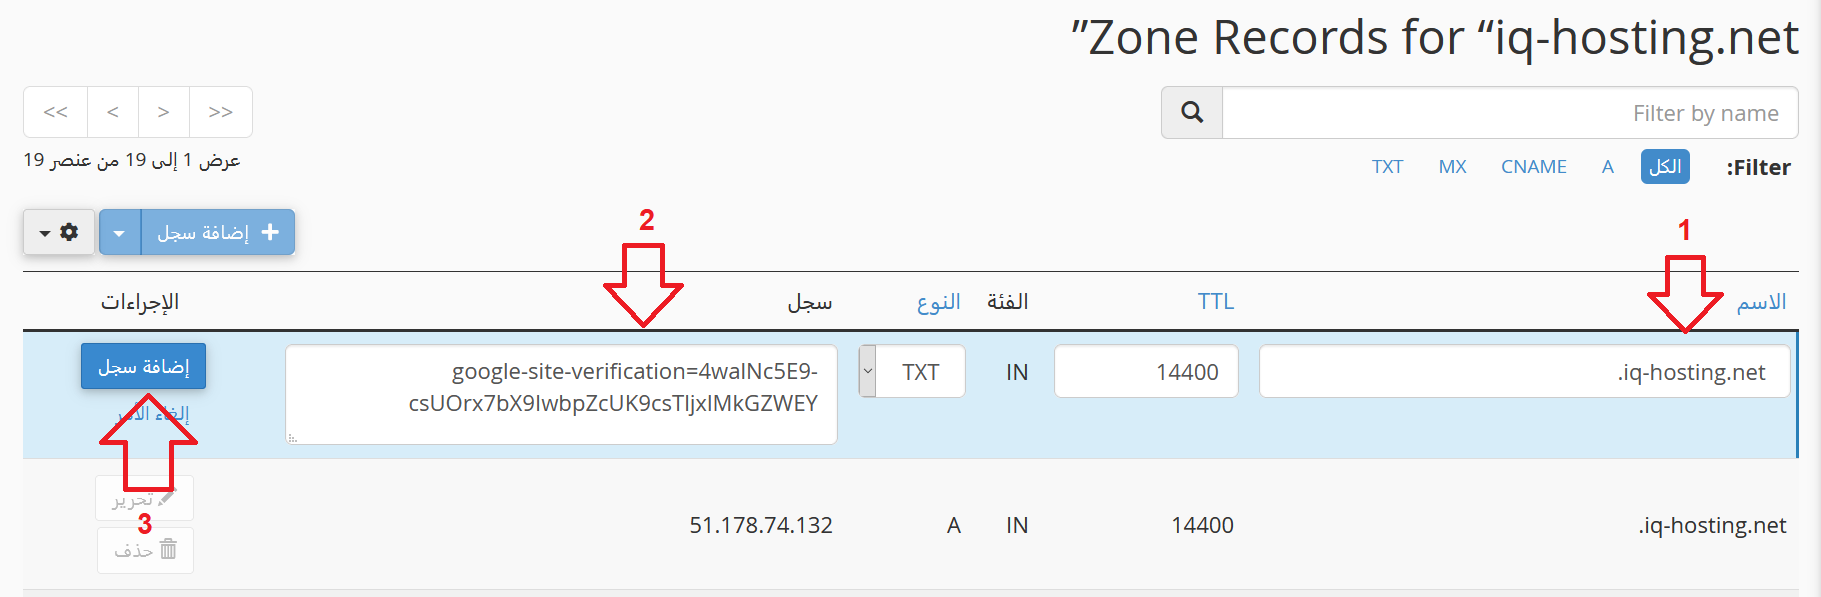
Data Example:
Name: example.com.
Record: google-site-verification=aBc123XyZ789...
TTL: 14400 (default)
Name: example.com.
Record: google-site-verification=aBc123XyZ789...
TTL: 14400 (default)
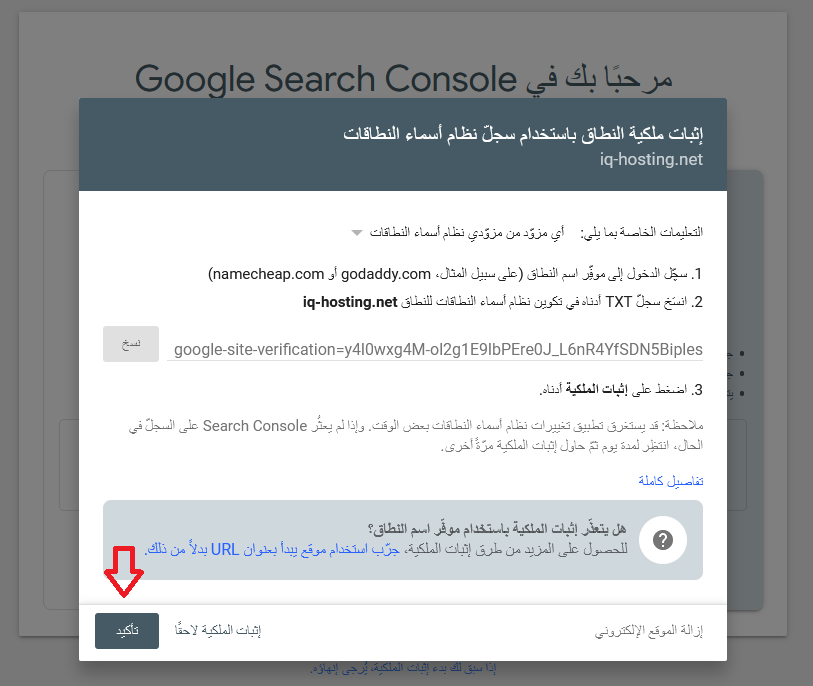
Step Eight: Save Record and Confirm
- Click the "Add Record" button to save changes
- Wait a few minutes for DNS changes to propagate
- Return to the Google Search Console page
- Click the "Verify" button
Confirmation of Success
After clicking "Verify", you will see a confirmation message indicating successful addition of your website to Google Search Console:
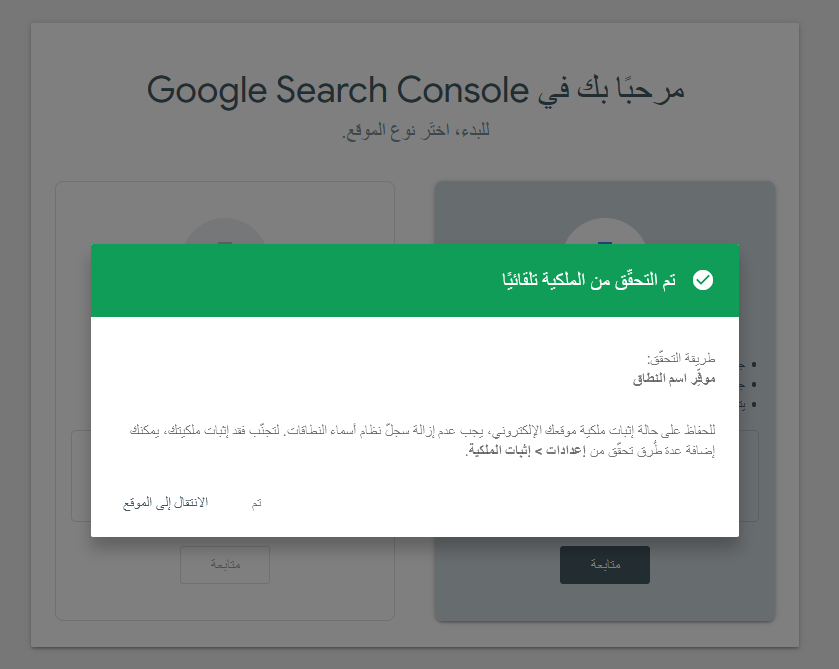
Congratulations! Your website has been successfully added to Google Search Console. You can now start monitoring your website's performance in search results.
Common Troubleshooting
If verification fails, make sure:
• Enter the verification code completely without extra spaces
• Wait 5-10 minutes after adding the TXT record
• Use the correct domain with a dot at the end (example.com.)
• There are no spelling errors in the verification code
• Enter the verification code completely without extra spaces
• Wait 5-10 minutes after adding the TXT record
• Use the correct domain with a dot at the end (example.com.)
• There are no spelling errors in the verification code
Next Steps
After successful verification, you can:
- Submit Sitemap: Add sitemap.xml for your website
- Monitor Performance: Track your website's appearance in search results
- Check for Errors: Discover and fix indexing issues
- Analyze Keywords: Learn what keywords visitors search for
- Request Indexing: Request quick indexing of new pages
Need Help? If you encounter any issues or have questions, don't hesitate to contact our support team and we'll be happy to help you.